
Last week I posted about the "comfy crafty" area in the corner of our bedroom,
next to our bed. You can see on the small table there is my cross stitch tool box.

Below is a closer look at the tool box.

One of the things that I'm most excited to share is the bobbin-thread holder.
With this tool, I've eliminated the paper legend. I feel like there
is one less step for my eyes as each new thread color is started.
My husband made this first set as a prototype.

I copy the paper legend....enlarging it so that can see it easily.
I've put black electric tape under the legend info so that these
holders can be reusable. The legend can be taken off and a new
one put in its place.
The bobbins are slipped through the key-type ring. Bobbins can
be taken off the ring and go back into the plastic bobbin case
in numerical order....*when*
the project is complete (you noticed I did say "when"??, okay
this is a grand hope that it WILL be a finished project eventually)

These are my favorite scissors on their custom made necklace.
LeAllyson Meyer makes the most wonderful scissor holders!
You can send her a picture of fabric or other color scheme and
she will make a beaded scissor necklace.....
or eyeglass necklace (as the one below) - just for YOU!

She also does other fun beaded items as well as jewelry.
If you visit her, please mention I spoke highly of her on this
blog post =)

These are some of my needles. So far, I don't feel too
particular about my needles, except that they be blunt ends.
I use a highlighter for marking stitches competed. I prefer the
highlighter over a colored or regular pencil. Pencils need
to be sharpened to mark off small areas of stitching. I can
get confused if I wait too long and have to mark off large areas.

If you look closely above you will see there are small squares
around some stitches. I know some of you might make a loud, large
gasp as you read this...but, those are mistakes. Yep...mistakes that will
remain stitched with the "wrong" color of thread. I do this only if
I feel that it will not undermine the design...and go unnoticed should
anyone not be holding the pattern in their hands to compare to my
stitching. The mistakes are marked with an Ultra Fine Sharpie, using
blue so it is differentiated from the pattern's markings in black.

All the tools fit nicely into this Snapware container. These containers
come in groups of three with one lid. So, those not being used have to
to stack taller together with one lid from another group. I prefer the "hard"
case as opposed to a soft zippered one. I feel that my tools are more
protected from being broken or bent while in the larger tote. I also
much prefer clear containers. The light that seeps in all around makes
it easier for me to find things in the "pile" of tools.
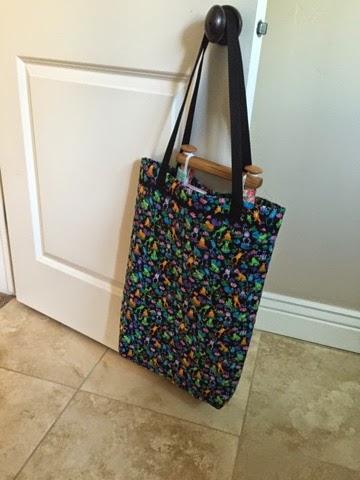
With my scroll of needlework and tool kit inside my tote...
I'm all ready to "GRAB n GO" =).
Or...just sit in a comfy place at home and everything is at my finger tips.
~~~~~~~~
How about you? Do you have special tool kits or Grab n Go kits
for your crafty adventures?
~~~~~~~~~~~~~~


